How to Make Your Own Lace Part Crochet Wig Cap
Here’s What You Will Need
Lace closure piece - Choose a regular transparent lace closure (not HD lace). HD lace is too thin for sewing. Either version from the listing works since we cut the bottom off anyway.
Weaving thread - Regular weaving thread is fine.
C-shaped weaving needle - My go-to. (Not the jumbo one.)
Crochet wig cap with small holes - The one with small holes and netting on the elastic band gives the best results.
Wig block in your correct size - Measure around your head two or three times and use the measurement you get most often.
Wig tripod or table mount - You’ll need something sturdy to hold your block while you work.
Everything you need is linked below in my Amazon store.
Step 1. Secure Your Lace Onto the Wig Block
Position the lace in the middle of your wig block. Even if the final look be a side part, it is easier to create the part with the lace positioned as a middle part.
Make sure the lace is laying completely flat. You do not want any buckling or lifting. This will help your part look clean and natural once the wig is finished.
Secure the lace to the wig block using straight pins. Do not use T pins because they can snag or tear the lace and cap.
When placing the lace, leave at least one inch of lace in the front that will NOT be under the cap. That extra inch ensures you end up with a complete lace part once you begin stitching.
Pin down the back first, then the sides. Slightly pull the lace as you pin so the surface stays flat.
Step 2. Place Your Crochet Wig Cap Over the Lace
Lay the crochet cap directly on top of the lace. Make sure the one inch of lace in the front is still exposed and not covered by the cap.
Pin the cap down so that it stays in place while we cut the cap and sew the lace onto the cap.
Step 3. Cut Your Part Opening
Decide how long you want your part to be. Make your decision based on the look you want and the hair you are using. A longer part means more detailed crocheting when you reach the top. A shorter part is quicker and easier.
Use scissors to cut one clean, straight line through the cap to create your part opening. Make sure the cut is straight from front to back. Be careful not to cut your lace.
Step 4. Sew One Side of the Cap to the Lace
Choose one side of the cut and pin it down straight. Begin sewing that side to the lace underneath.
Before you start sewing, you need to lock your thread onto the cap.
Go through the first hole of the cap and the lace, pull your needle up, then slide your needle between the two pieces of thread at the knot. Pull it tight. This locks your thread in place so it won’t unravel later.
When you bring your needle up through the cap and the lace, don’t pull the thread all the way through right away. You want a small loop to form.
The loop is created by the thread that is connected to your needle and the thread that is connected to the cap.
Take your needle and slide it through that loop.
This locks your stitch in place so it stays neat and doesn’t unravel.
I like to start stitching in the back and work my way toward the front of the cap.
Take your time. Keep your stitches close together as you sew so your lace lays flat.
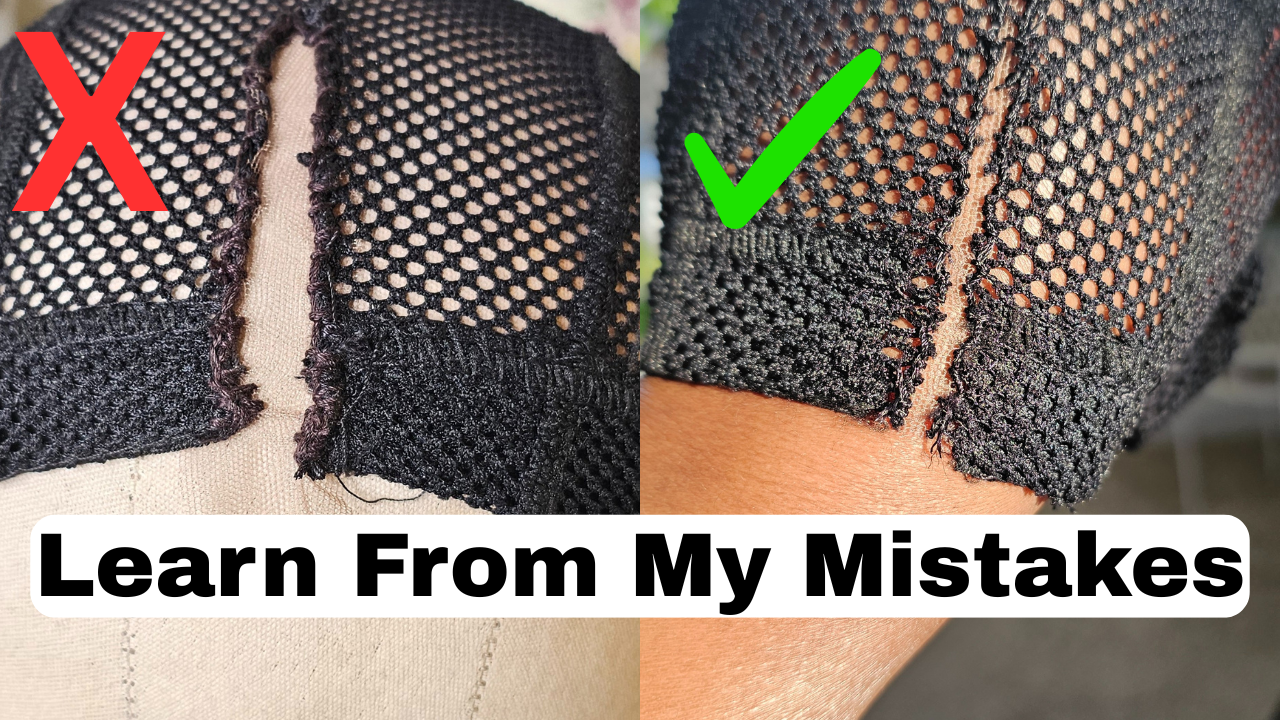
Make sure you stitch all the way to the end of the cap so the lace and the cap are fully attached. You don’t want any lifting or a small opening at the front. Everything should be completely connected and laying flat.
Once you place your last stitch, loop it, tie at least two knots to secure it, and then cut off the extra thread.
Step 5. Pin and Sew the Other Side
Pin down the second side of the part. Make sure the two front edges are aligned so one side is not farther forward than the other.
Consider the width of the part before sewing. If the part is too narrow and your hair is curly, the curls will hide the lace. If the part is too wide, it will look unnatural. Think about the texture of the crochet hair you will be using and adjust the spacing accordingly.
Sew the second side down using small, close stitches to keep the lace flat.
I like to start stitching in the back and work my way toward the front of the cap.
Again, take your time. Keep your stitches close together as you sew so your lace lays flat.
Make sure you stitch all the way to the end of the cap so the lace and the cap are fully attached. You don’t want any lifting or a small opening at the front. Everything should be completely connected and laying flat.
Once you place your last stitch, loop it, tie at least two knots to secure it, and then cut off the extra thread.
Step 6. Remove the cap and trim the excess
Once both sides are fully sewn, remove the wig cap from the block and carefully trim away the extra lace around the stitched area.
I find it easier to turn the cap inside out and place it back on the wig block to remove the extra lace.
If you cut neatly, you may be able to reuse the leftover pieces for other projects.
Step 7. Make Your Lace Part Crochet Wig
Now you’re ready to make your lace part crochet wig. Place your cap back on the block as a middle part, pin it down, and get started.
