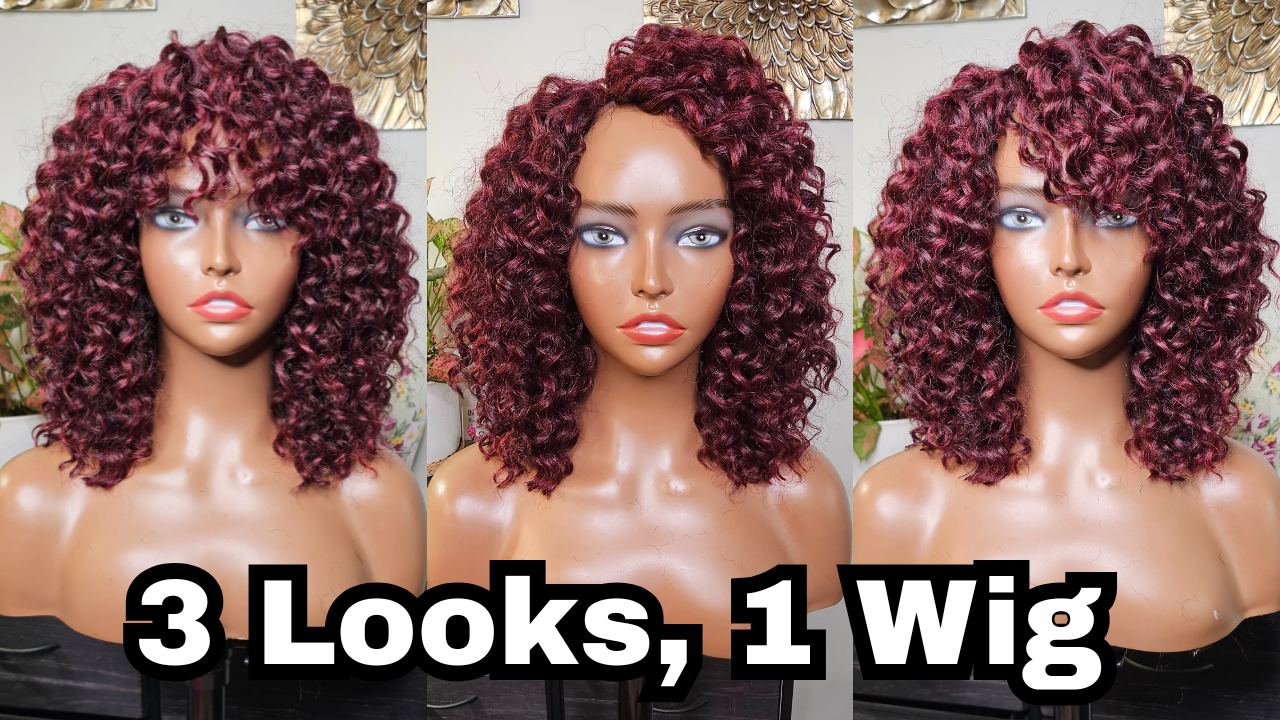
How to Cut and Shape Synthetic Curly Crochet Wigs
Cutting synthetic curly crochet hair doesn’t have to be stressful. Once you understand how to prep the hair and the cutting technique, it becomes simple, clean, and natural-looking. In this tutorial, I’m showing you how I cut and shape synthetic crochet wig hair so it lays flatter, blends better, and frames the face. This method works for crochet wig installs and crochet wigs and is especially beginner-friendly.
Before You Start Cutting
Before you pick up your scissors, here are a few things that make the process easier:
- Have a picture or inspo of the look you want
- Cut on your head if possible for best accuracy
- If not cutting on your head, use a measuring tape for a length guide
- Make sure the wig is secure so it doesn’t shift while cutting
- Position the hair how you plan to wear it (bangs, side part, etc.)
- Apply Hawaiian Silky (or your favorite product) to your hands to help control frizz
- Clip the front/bang area out of the way so you can work on the sides first
Cutting Technique (Very Important)
Before getting into the actual tutorial, here’s the technique that gives crochet wigs a soft, natural finish.
- Do not cut big sections at once
Avoid grabbing handfuls of hair and chopping. That will give you blunt ends and the wig will not look natural. Instead, cut one or two coils at a time. - Point your scissors downward
Always point your scissors downward as you cut. This prevents straight, harsh lines. - Do not close the scissors completely
When cutting synthetic curls, do not close the blades all the way. Instead, I “chew” through the curl. This prevents blunt ends and keeps the finish soft, clean, and natural. - How to create face-framing layers (optional)
If you want layers around the face, start your next cut right where the previous piece ends, then cut downward so it gradually gets longer toward the bottom. This blends the hair from the bang area into the sides instead of leaving a harsh corner. If you don’t want layers, skip this step. The same coil-by-coil cutting method still applies.
Now Let’s Get Into the Tutorial
Here’s the exact order I used:
Step 1: Clip the front
Pull the hair forward that is going to frame your face and clip it so you don’t accidentally cut it while working on the sides.
Step 2: Cut one side
Apply Hawaiian Silky to your hands again and start on one side. Follow the technique above: one to two coils at a time, scissors pointed downward, and chew through the curl. Cut to your desired length.
Step 3: Match the opposite side
Once one side is done, use that length as your guide for the opposite side. I eyeballed it using my scissors, but if you need more accuracy you can bring a curl over from the finished side to help match the length.
Step 4: Cut the back
Move to the back and repeat the same coil-by-coil technique. When cutting on a wig block, focus on cleaning up the length, keeping the ends soft, and connecting the back to the sides.
Step 5: Cut the bang area
Unclip the front and position the hair how you want it to fall on your face. Reapply Hawaiian Silky to your hands to control frizz. Cut in small sections using the same downward coil-by-coil method.
Step 6: Add layers (if desired)
If you’re adding layers, start each new cut where the previous piece ends and cut downward to keep the blend soft.
Step 7: Final shape and clean up
Fluff the wig, shake it, or move the curls around to see how it falls. Then snip any stray curls, long pieces, or areas that need more blending.
Key Takeaways
- Cut curl-by-curl, not in chunks
- Always point scissors downward
- Do not close blades all the way (chewing motion)
- Use the first side as a length guide
- Apply product to hands to reduce frizz while cutting
- Layers start where the previous piece ends
- Take your time and work slowly
- It’s better to cut long first and trim more later
Final Thoughts
Cutting synthetic crochet hair is all about technique. Once you understand coil-by-coil cutting and how to create soft transitions around the face, the wig ends up looking natural, wearable, and styled instead of blunt. If you’re learning how to make or customize crochet wigs, this is one of the simplest skills that will instantly elevate your results.